Wednesday, March 21, 2012

Christening cake

so, this is my first official 2 tier cake! and i had to go find out and source all the goodies involved. mostly i just got blank stares from shop assistants and flat; non capito's. anyway, this cake nearly drained my life force is took about 7 times my usual cake batter recipe. and im still trying to subdue the mighty fondant! but it turned out alright
 
so, i am also experimenting with making royal icing 3d shapes which is a lengthy process because you have to make and glue piece together but it is fun making 3 dimensional objects out of sugar. but if you are going to make something such as this pram a a cake topper, i suggest you attach it at the event, make a spare and keep them in a bulletproof box because they are really fragile. i couldnt take the cake to the event and got my lovely friend nina to do it for me. but, somehow or other, the pram got broken, and she felt really bad. but they covered the top in daffodils and im sure it looked beautiful in the end!
something that did not look beautiful in the end, was my kitchen. it looked like a sugar bomb hit it. for days i  was scrubbing cement like fondant marks off the counter top.

so the cake was, vanilla sponge layered with dark choc chip-white ganache icing. covered in a layer of  white buttercream ganache. covered in white fondant with white royal icing decoration. top tier was 18cm bottom tier 30cm


but at the eye of the storm was this banner and everytime things got too hectic and the cake threatened to  overtake my mind, i glanced over at this happy banner :)

i dont think im going to make a cake this big again, unless i have a shiny  kitchen aid to help me. i salute all home bakers who make wedding cakes, its really hard work!


Sunday, March 18, 2012

Sun-dried tomato, feta and black pepper savoury scones

oh my great granny! if you thought sweet scones were good, it was only because you havent tasted  these! savoury,  peppery, cheesy bits of goodness. wish i had one right now
you can almost pipe this dough its so soft

so these are scones, i just cut them into squares because i dont have a round cutter.
you could also form it into thin pieces which would taste like cheese straws.
add a few slabs of mozzarella and you will be in heaven

feta and sundried tomato are the best!!


Ingredients:

450gr self raising flour
1 tsp salt
2 tsp pepper
60 gr butter
430 ml buttermilk

as much feta and sun dried tomatoes as you like! i used about 1/4 cup chopped sundried tomatos and 1/2 cup chopped feta


1. sift dry ingredients together and rub in chopped butter. stir in flavourings and enough buttermilk to make a soft sticky dough
2. turn onto a floured surface and knead very lightly, just until its smooth. press it out to 2.5 cm thickness and use cutters to cut 5cm rounds/ shape it as you like.
3. brush tops with egg, place on baking paper and bake in very hot oven (200-220'C) for 15 min.

Tuesday, March 13, 2012

Clare's rainbow birthday cupcakes!


Happy Birthday dear sister! may you have a wonderful year ahead of you :)
i made rainbow cupcakes to brighten up your day!

lets go fly a kite, up to the highest height.
lets go fly a kite and send it soaring...

sweet 19 today
is it a bird.. is it a plane.. no its super-pig!
i absolutely enjoyed making these, and got happier and happier as they came together
they are actually rainbow cupcakes (they never seem to work out perfectly for me so hope you have better luck)
buttercream covered in fondant with fondant decorations, buttercream clouds and royal icing banners

the banners are particularly fragile. i smashed 2 just photographing them, and i was being unusually careful!
(instructions on how to make them below)

make extras because they break break break!

Make Royal icing Banners: i printed out the banner shape and slid the printout under a sheet of baking paper. using stiff royal icing i piped the shapes and flooded them in white royal icing. also pipe lines of icing which will be the rods to hold up the banners. when the banners dried a few hours later, i piped the writing and outlines ontop with stiff purple royal icing. let that dry. carefully remove them from the paper, turn them over and glue the rods to the back of the banner with a blob of royal icing. let that dry.

Monday, March 5, 2012

The Fondant test..

I decided to try work with fondant but the thing is, you cant buy the ready made thing in Italy and  anyway, its tastes pretty bad. so i made my own using this kind person's recipe.
it went alright, but for rolling it into a gigantic sheet for the cake. this was impossible!
This weekend i made a baby themed party table with a half fondant covered chocolate cake, made from my usual black magic cake recipe
 fondant covered vanilla cupcakes (recipe below) and royal iced chocolate biscuits, recipe here

sleeping baby
working with fondant on small things like cupcakes is fantastic. except every speck of dust and lint is attracted to the fondant!!! its incredible how it picks up anything in its path!!. and if you over work it... it gets crumbly and cracks. yay.
baby shoes and imprinted icing. look around for any interesting textures you may have around the house and press them into the fondant! lots of fun, just make sure they are clean first!
this is a royal icing flower made with a wilton 2D icing tip. i made it before and let it dry first. the leaf is from fondant with a leaf cutter gadget thing.
some biscuits marked with D. 
if you had time, a few nice plates and glass bell jars this could really look spectacular at a party. but i have none of those things and besides, my colleagues at work ate up all the evidence


cake iced with white royal icing from a pattern i found on the internet. came out fantastically in spite of the gas oven that is my burden! because... i bought an oven thermometer!!!! yay
thanks to a friend, i found a fantastic baking shop in Rome!!! it has nearly everything i could ever need. its called Peroni and is in Piazza dell Unita.

flowers out of fondant


Vanilla Cupcakes

125gr butter (softened but not runny)
1 cup flour
1.5 tsp baking powder
125gr sugar (normal white sugar or castor sugar)
2 eggs
1 tsp vanilla esscence
3 table spoons milk

1. cream butter and sugar into a pale very fluffy mixture (beat for a long time2)
2. add eggs one at a time, mixing well after each, then add vanilla, mix well
3. add sifted flour and baking powder, alternating with milk. (start and end with flour)
4. spoon batter into cupcake cases until just over half full
5. bake at 200'C for about 12 min

xxx

Saturday, March 3, 2012

Chocolate orange meringues

this is one of the meringues ontop of a chocolate cup filled with orange filling...

these double flavoured meringues are very moreish so watch out
now, these are blood oranges. this is my first experience with them and when i peeled one to eat it i got a shock, it was almost revolting really. cut like this they don't look to strange but it really made my stomach turn to look at them. it looks like someone has literally injected blood into an orange (closely followed by an evil laugh)
creepy but beautiful. i wanted to use these in a recipe so i made orange filling for my chocolate  cups but.. i didnt like the filling in the end so im just showing you the oranges really, no recipe for this part. 
mini cups like this are perfect for rich, sweet bites

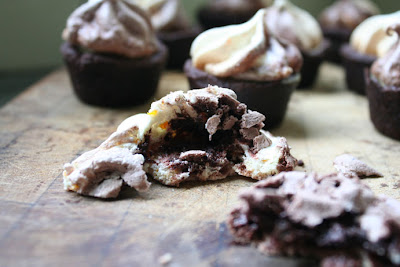
yum! the inside of these meringues are chewy and chocolatey with  bitter orange , mmm so good! 


this is a fantastic chocolate ball of unbaked tart crust. it is so rich and delicious, definately will make it again soon. its like cookie dough and  a good  bit of it did not make the oven

Recipe for the chocolate dough crust:

adapted from The Australian women's weekly- Sweet old fashioned favourites, recipe book.
for one 24cm tart/pie

185gr flour
30ml cocoa powder
125gr butter, chopped
1 egg yolk

- mix flour, cocoa, rub in butter with fingertips until combined. add egg yolk and mix until ingredients cling together. add a little water if you need.
- knead dough on a floured surface (more like press together until it forms a smooth dough) wrap in clingwrap and refrigerate for 30 min
- roll out between 2 sheets baking paper. lift it into the tin, press into the sides of the tin and trim the edges.
- put baking parchment paper in tin over dough, fill the paper with dried rice or beans, bake uncovered on 180'c for 15 minutes. remove parchment and beans and bake for a further 10 min.
- pour in your filling of choice and bake according to those instructions.
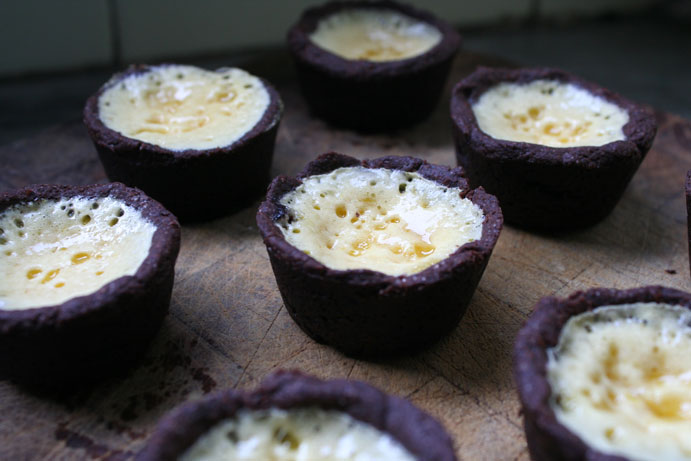
for small tarts like this, there is no need to bake  them blind (put beans/ceramic beads inside it when you bake beforehand). but they do need to be baked for about 15-20 min by themselves before you put the filling in.
tarts and blood orange filling (did not like how the filling came out, so there is no recipe for that but this rich chocolate crust recipe is here and it will taste good with whatever you fill it with!)

on buttered and cornfloured baking paper (not wax paper or tinfoil!) piped and ready to go!
Recipe for Chocolate-orange meringues
from Easy living but slightly adapted


Ingredients

· 3 large egg whites

· Pinch salt

· 175g (6oz) caster sugar 

- 2 tbsp finely chopped orange rind

- 4 blocks grated dark chocolate
- 2 tbsp cocoa powder

method

1. Heat the oven to 140°C (gas mark 1), and line two baking trays with baking paper.

2. Place the egg whites and a pinch of salt in the bowl of an electric mixer. Using the whisk attachment, beat on a low speed for 1 minute, then increase the speed to medium and whisk for 2-3 minutes, or until the egg whites form fairly stiff but still moist-looking peaks. If you lift the beater out of the bowl, the mixture should look fluffy and cling to the beaters.

3. Continue to whisk, gradually adding the sugar a tablespoon at a time until all the sugar has been added and the mixture is stiff and glossy - this may take 5-10 minutes. 
beat and beat until your eyes go squint and arms starts detaching itself from your body. beat until the misture looks like this. smooth, thick and glossy and it holds its form.
4.divide mixture between two bowls. to one bowl Gently fold in orange rind with a spoon, using large gentle strokes and turning the bowl as you go. Continue until evenly distributed.
chocolate and orange

5. FOR CHOCOLATE MERINGUE bowl: Fold 2tbsp sifted cocoa powder and 40g (1¼ oz) finely chopped or grated dark chocolate into the mixture. 

this is a strange pic i know. but it is looking into the piping bag, you put the two flavours in  on either side and when you squeeze, it comes out two-toned!
6. make/ get a big piping bag, put nozzle on end, i used a large star shaped nozzle. although you can always just snip off the tip of the bag at your desired diameter. spoon orange meringue mixture only onto one side of the bag but spread all the way down from the nozzle to the opening of the bag. spoon chocolate mixture only along the other side, evenly all the way down to the nozzle. now when you squeeze the bag you should get a two coloured flow of meringue!

7. Bake for 30-40 minutes (swapping the position of the tray after 20 minutes), or until pale and dry. Turn off the heat and allow the meringue to cool in the oven with the door slightly ajar.

buon appetito!